# OpenCore and macOS 11: Big Sur
It's that time of year again and with it, and a new macOS beta has been dropped. Here's all the info you need to get started.
Reminder
This page will be a small discussion on exactly what you need to prepare for Big Sur, a more in depth look into what's changed on Big Sur can be found here:
# Table of Contents
- Table of Contents
- Prerequisites
- Installation
- Troubleshooting
- Stuck at Forcing CS_RUNTIME for entitlement
- Stuck at PCI Configuration Begins for Intel's X99 and X299 boards
- Stuck on ramrod(^^^^^^^^^^^^^)
- X79 and X99 Kernel Panic on IOPCIFamily
- DeviceProperties injection failing
- Keyboard and Mouse broken
- Early Kernel Panic on max_cpus_from_firmware not yet initialized
- Cannot update to newer versions of Big Sur
- Kernel Panic on Rooting from the live fs
- Asus Z97 and HEDT(ie. X99 and X299) failing Stage 2 Installation
- Laptops kernel panicking on cannot perform kext scan
- Reboot on "AppleUSBHostPort::createDevice: failed to create device" on macOS 11.3+
# Prerequisites
Before we can jump head first into installing Big Sur, we need to go over a few things:
# A supported SMBIOS
Big Sur dropped a few Ivy Bridge and Haswell based SMBIOS from macOS, so see below that yours wasn't dropped:
- iMac14,3 and older
- Note iMac14,4 is still supported
- MacPro5,1 and older
- Macmini6,x and older
- MacBook7,1 and older
- MacBookAir5,x and older
- MacBookPro10,x and older
If your SMBIOS was supported in Catalina and isn't included above, you're good to go!
Supported SMBIOS
SMBIOS still supported in macOS Big Sur:
- iMac14,4 and newer
- MacPro6,1 and newer
- iMacPro1,1 and newer
- Macmini7,1 and newer
- MacBook8,1 and newer
- MacBookAir6,x and newer
- MacBookPro11,x and newer
For full list of supported SMBIOS including OS support, see here: Choosing the right SMBIOS
For those wanting a simple translation for their Machines:
- iMac13,1 should transition over to using iMac14,4
- iMac13,2 should transition over to using iMac15,1
- iMac14,2 and iMac14,3 should transition over to using iMac15,1
- Note: AMD CPU users with Nvidia GPUs may find MacPro7,1 more suitable
- iMac14,1 should transition over to iMac14,4
# Supported hardware
Not much hardware has been dropped, though the few that have:
- Official Ivy Bridge U, H and S CPUs.
- These CPUs will still boot without much issue, but note that no Macs are supported with consumer Ivy Bridge in Big Sur.
- Ivy Bridge-E CPUs are still supported thanks to being in MacPro6,1
- Ivy Bridge iGPUs slated for removal
- HD 4000 and HD 2500, however currently these drivers are still present in 11.0.1
- BCM4331 and BCM43224 based WiFi cards.
- See Wireless Buyers guide (opens new window) for potential cards to upgrade to.
- Potential work-around is to inject a patched IO80211Family, see here for more details: IO80211 Patches (opens new window)
- Certain SATA controllers dropped
- For some reason, Apple removed the AppleIntelPchSeriesAHCI class from AppleAHCIPort.kext. Due to the outright removal of the class, trying to spoof to another ID (generally done by SATA-unsupported.kext) can fail for many and create instability for others.
- A partial fix is to inject Catalina's version with any conflicting symbols being patched. You can find a sample kext here: Catalina's patched AppleAHCIPort.kext (opens new window)
- We recommend setting the MinKernel value to 20.0.0 for the kext
CtlnaAHCIPort.kextto avoid any potential conflicts. This way, it will work in both Catalina and Big Sur so you can remove SATA-unsupported if you want.
Other notable changes:
- MSI Navi users no longer require the
ATY,rom/-wegnoegpupatch to boot the installer - Stage 2 installation requiring working NVRAM
- Asus 9 series: For more info, see here: Haswell ASUS Z97 Big Sur Update Thread (opens new window)
- X99 and X299 users with broken NVRAM will need to install on another machine and move the SSD when done
# Up-to-date kexts, bootloader and config.plist
Ensure that you have the latest version of OpenCore, kexts and config.plist so it won't have any odd compatibility issues. You can simply download and update OpenCore and kexts as mentioned here:
If you're unsure what version of OpenCore you're using, you can run the following in terminal:
nvram 4D1FDA02-38C7-4A6A-9CC6-4BCCA8B30102:opencore-version
- Note: The about command will require you to include bit
0x2inMisc -> Security -> ExposeSensitiveData, recommended values for ExposeSensitiveData is0x6which includes bits0x2and0x4.
# AMD Note
Reminder for AMD Users: Don't forget to update your kernel patches with those provided by AMD OS X, otherwise you'll be unable to boot Big Sur:
# Intel HEDT Note
For X79, X99 and X299 users, pay close attention to the below. Big Sur has added new requirements for ACPI, so you'll need to grab some new SSDTs:
- X79
- X99
- X299
For those who'd like precompiled files, see here:
# Known issues
With Big Sur, quite a bit broke. Mainly the following:
- Lilu
- Mainly user-space patching has severely broke, meaning certain functionality may have broken
- These include:
- DiskArbitrationFixup
- MacProMemoryNotificationDisabler
- SidecarEnabler
- SystemProfilerMemoryFixup
- NoTouchID
- WhateverGreen's DRM and -cdfon patches
- AirportBrcmFixup
- Forcing a specific driver to load with
brcmfx-driver=may help- BCM94352Z users for example may need
brcmfx-driver=2in boot-args to resolve this, other chipsets will need other variables.
- BCM94352Z users for example may need
- Setting MaxKernel to 19.9.9 for AirPortBrcm4360_Injector.kext may help. More information from the repo (opens new window)
- Forcing a specific driver to load with
- SATA Support broken
- Due to Apple dropping the AppleIntelPchSeriesAHCI class in AppleAHCIPort.kext
- To resolve, add Catalina's patched AppleAHCIPort.kext (opens new window) with the MinKernel set to 20.0.0
- XhciPortLimit broken in macOS 11.3 Beta 2 and newer
- With macOS 11.3 and newer, XhciPortLimit is broken resulting in boot loops (opens new window). We advise users either install an older OS(ie. macOS 10.15, Catalina) or find a 11.2.3 or older Big Sur installer
- For education purposes, we have a copy provided here: macOS 11.2.3 InstallAssistant(macOS) (opens new window)
- If you've already mapped your USB ports (opens new window) and disabled
XhciPortLimit, you can boot macOS 11.3+ without issue
- With macOS 11.3 and newer, XhciPortLimit is broken resulting in boot loops (opens new window). We advise users either install an older OS(ie. macOS 10.15, Catalina) or find a 11.2.3 or older Big Sur installer
And while not an issue, SIP has now gained a new bit so to properly disable SIP you need to set csr-active-config to FF0F0000. See here for more info: Disabling SIP
# Installation
Guides have been updated to accommodate Big Sur, see the applicable OS environment for you:
# Troubleshooting
# Stuck at Forcing CS_RUNTIME for entitlement
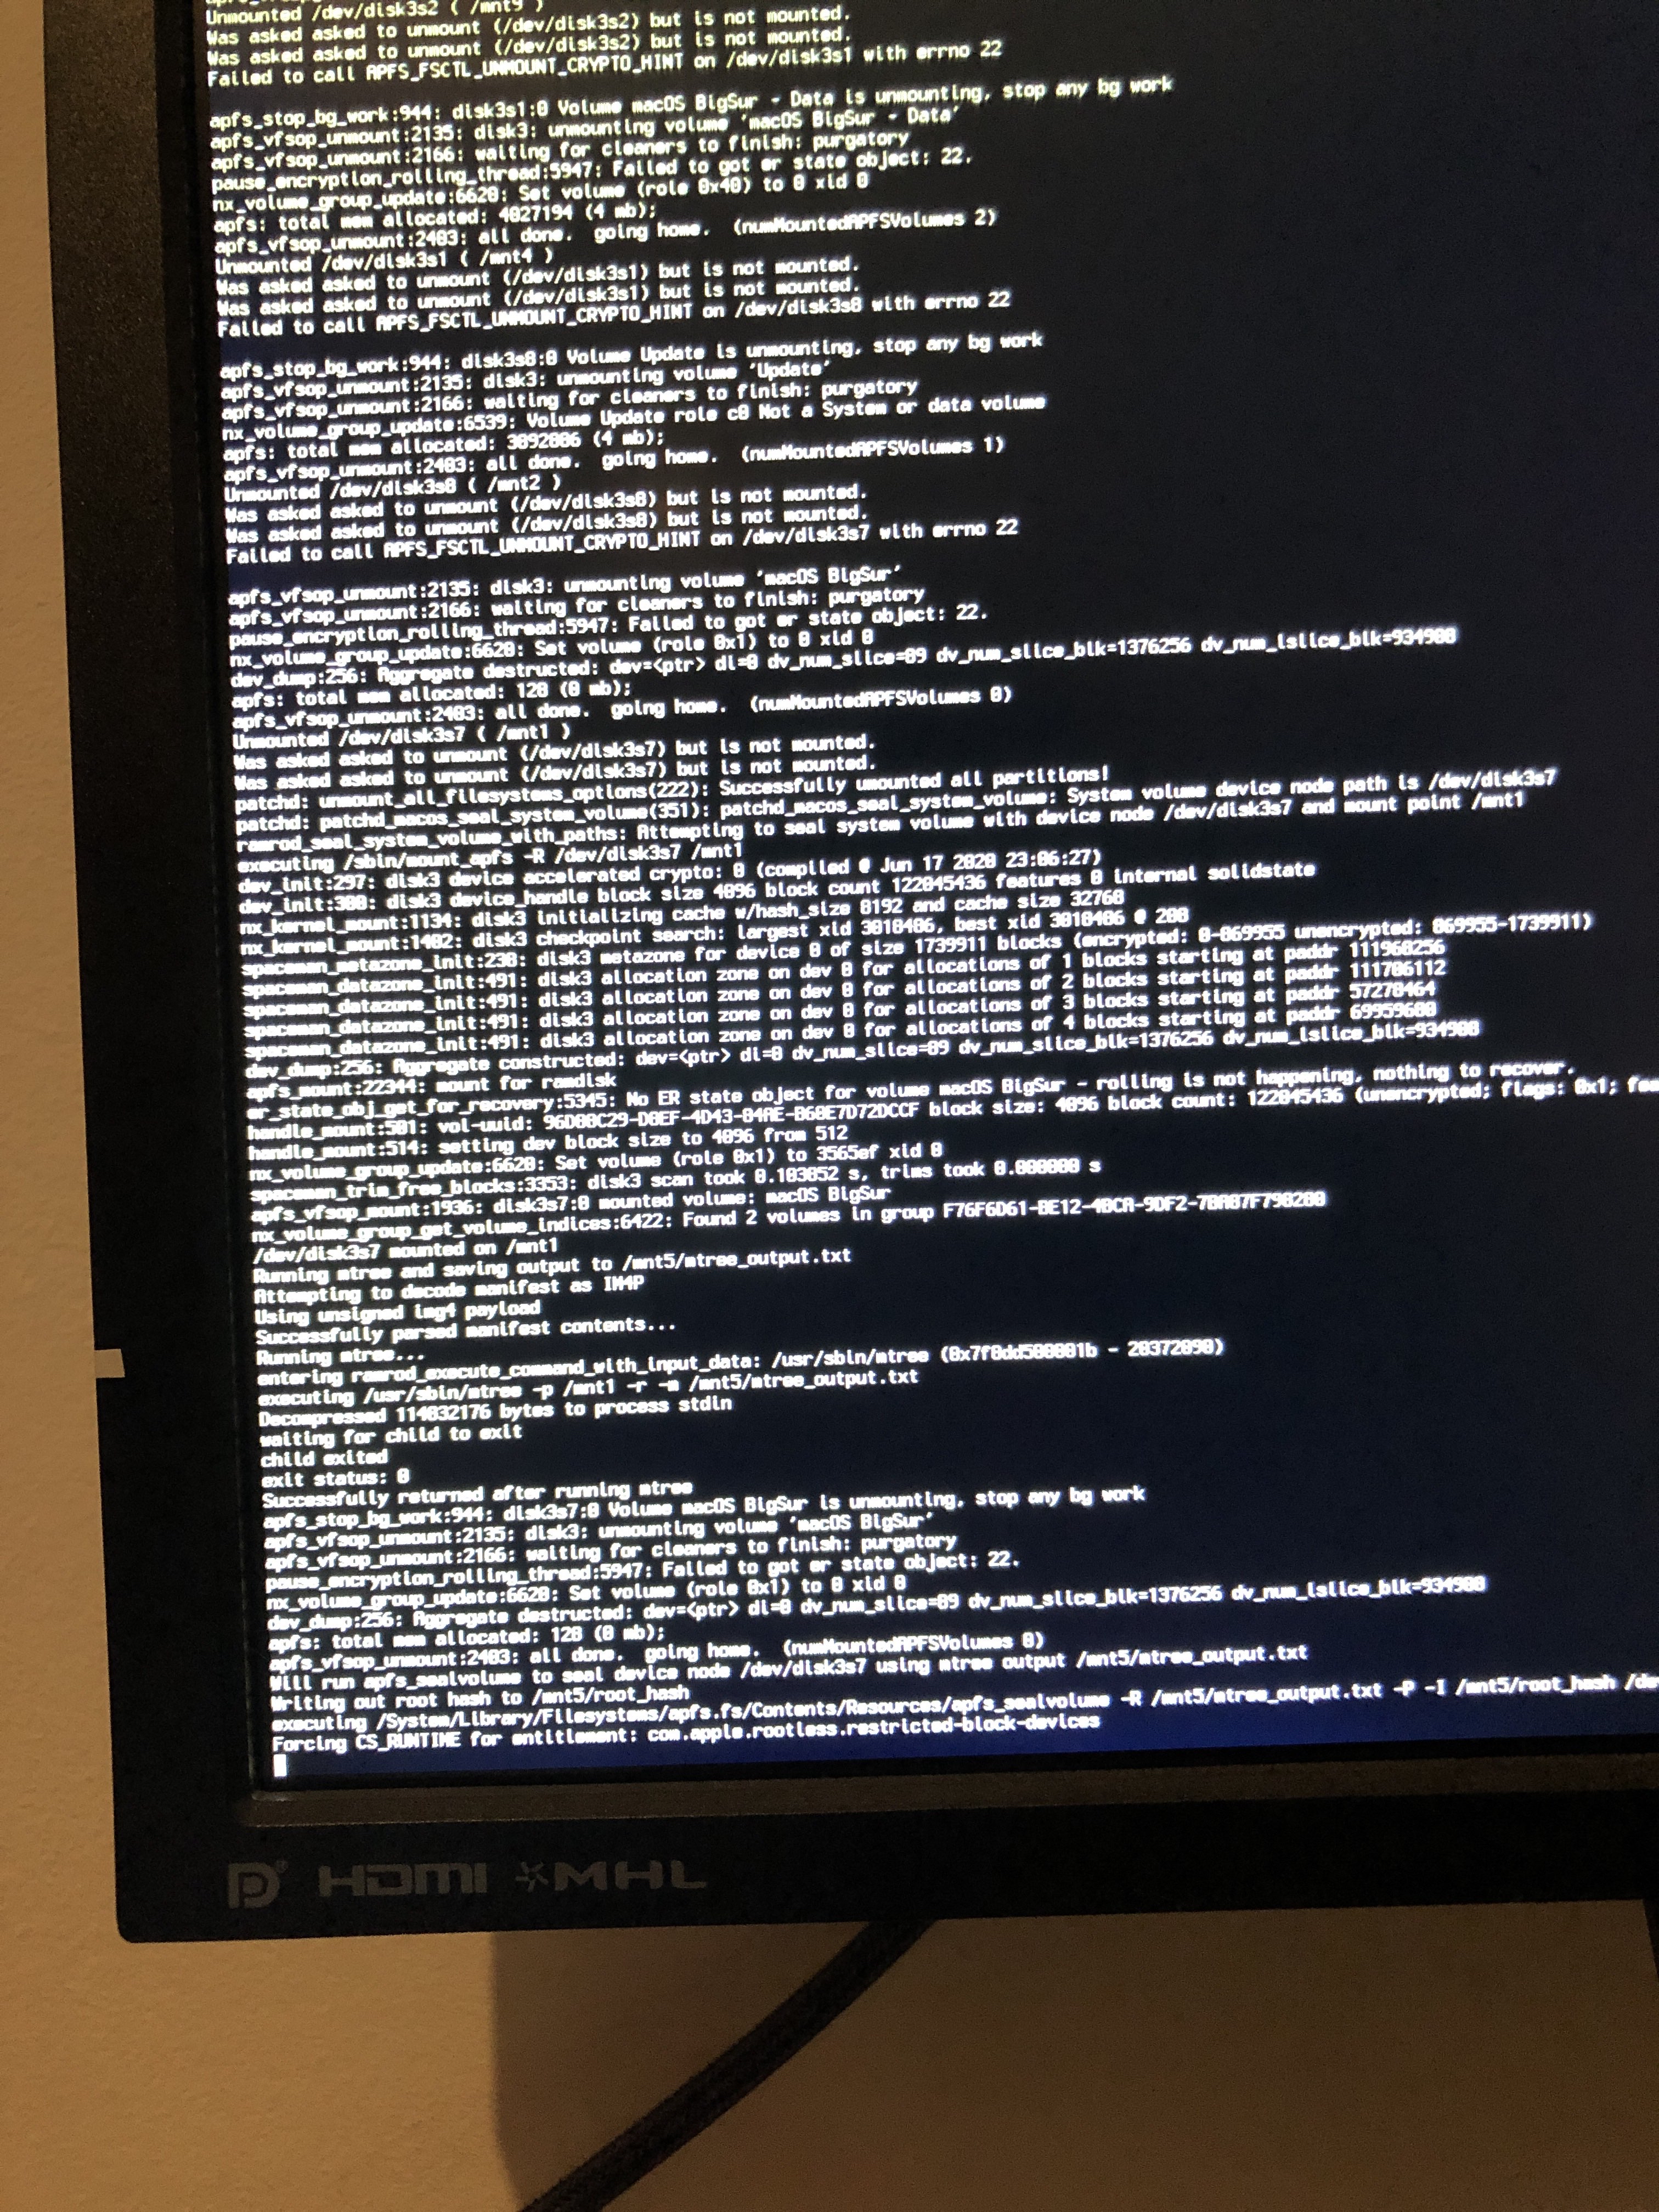
This is actually the part at where macOS will seal the system volume, and where it may seem that macOS has gotten stuck. DO NOT RESTART thinking you're stuck, this will take quite some time to complete, otherwise you'll break your installation.
# Stuck at PCI Configuration Begins for Intel's X99 and X299 boards
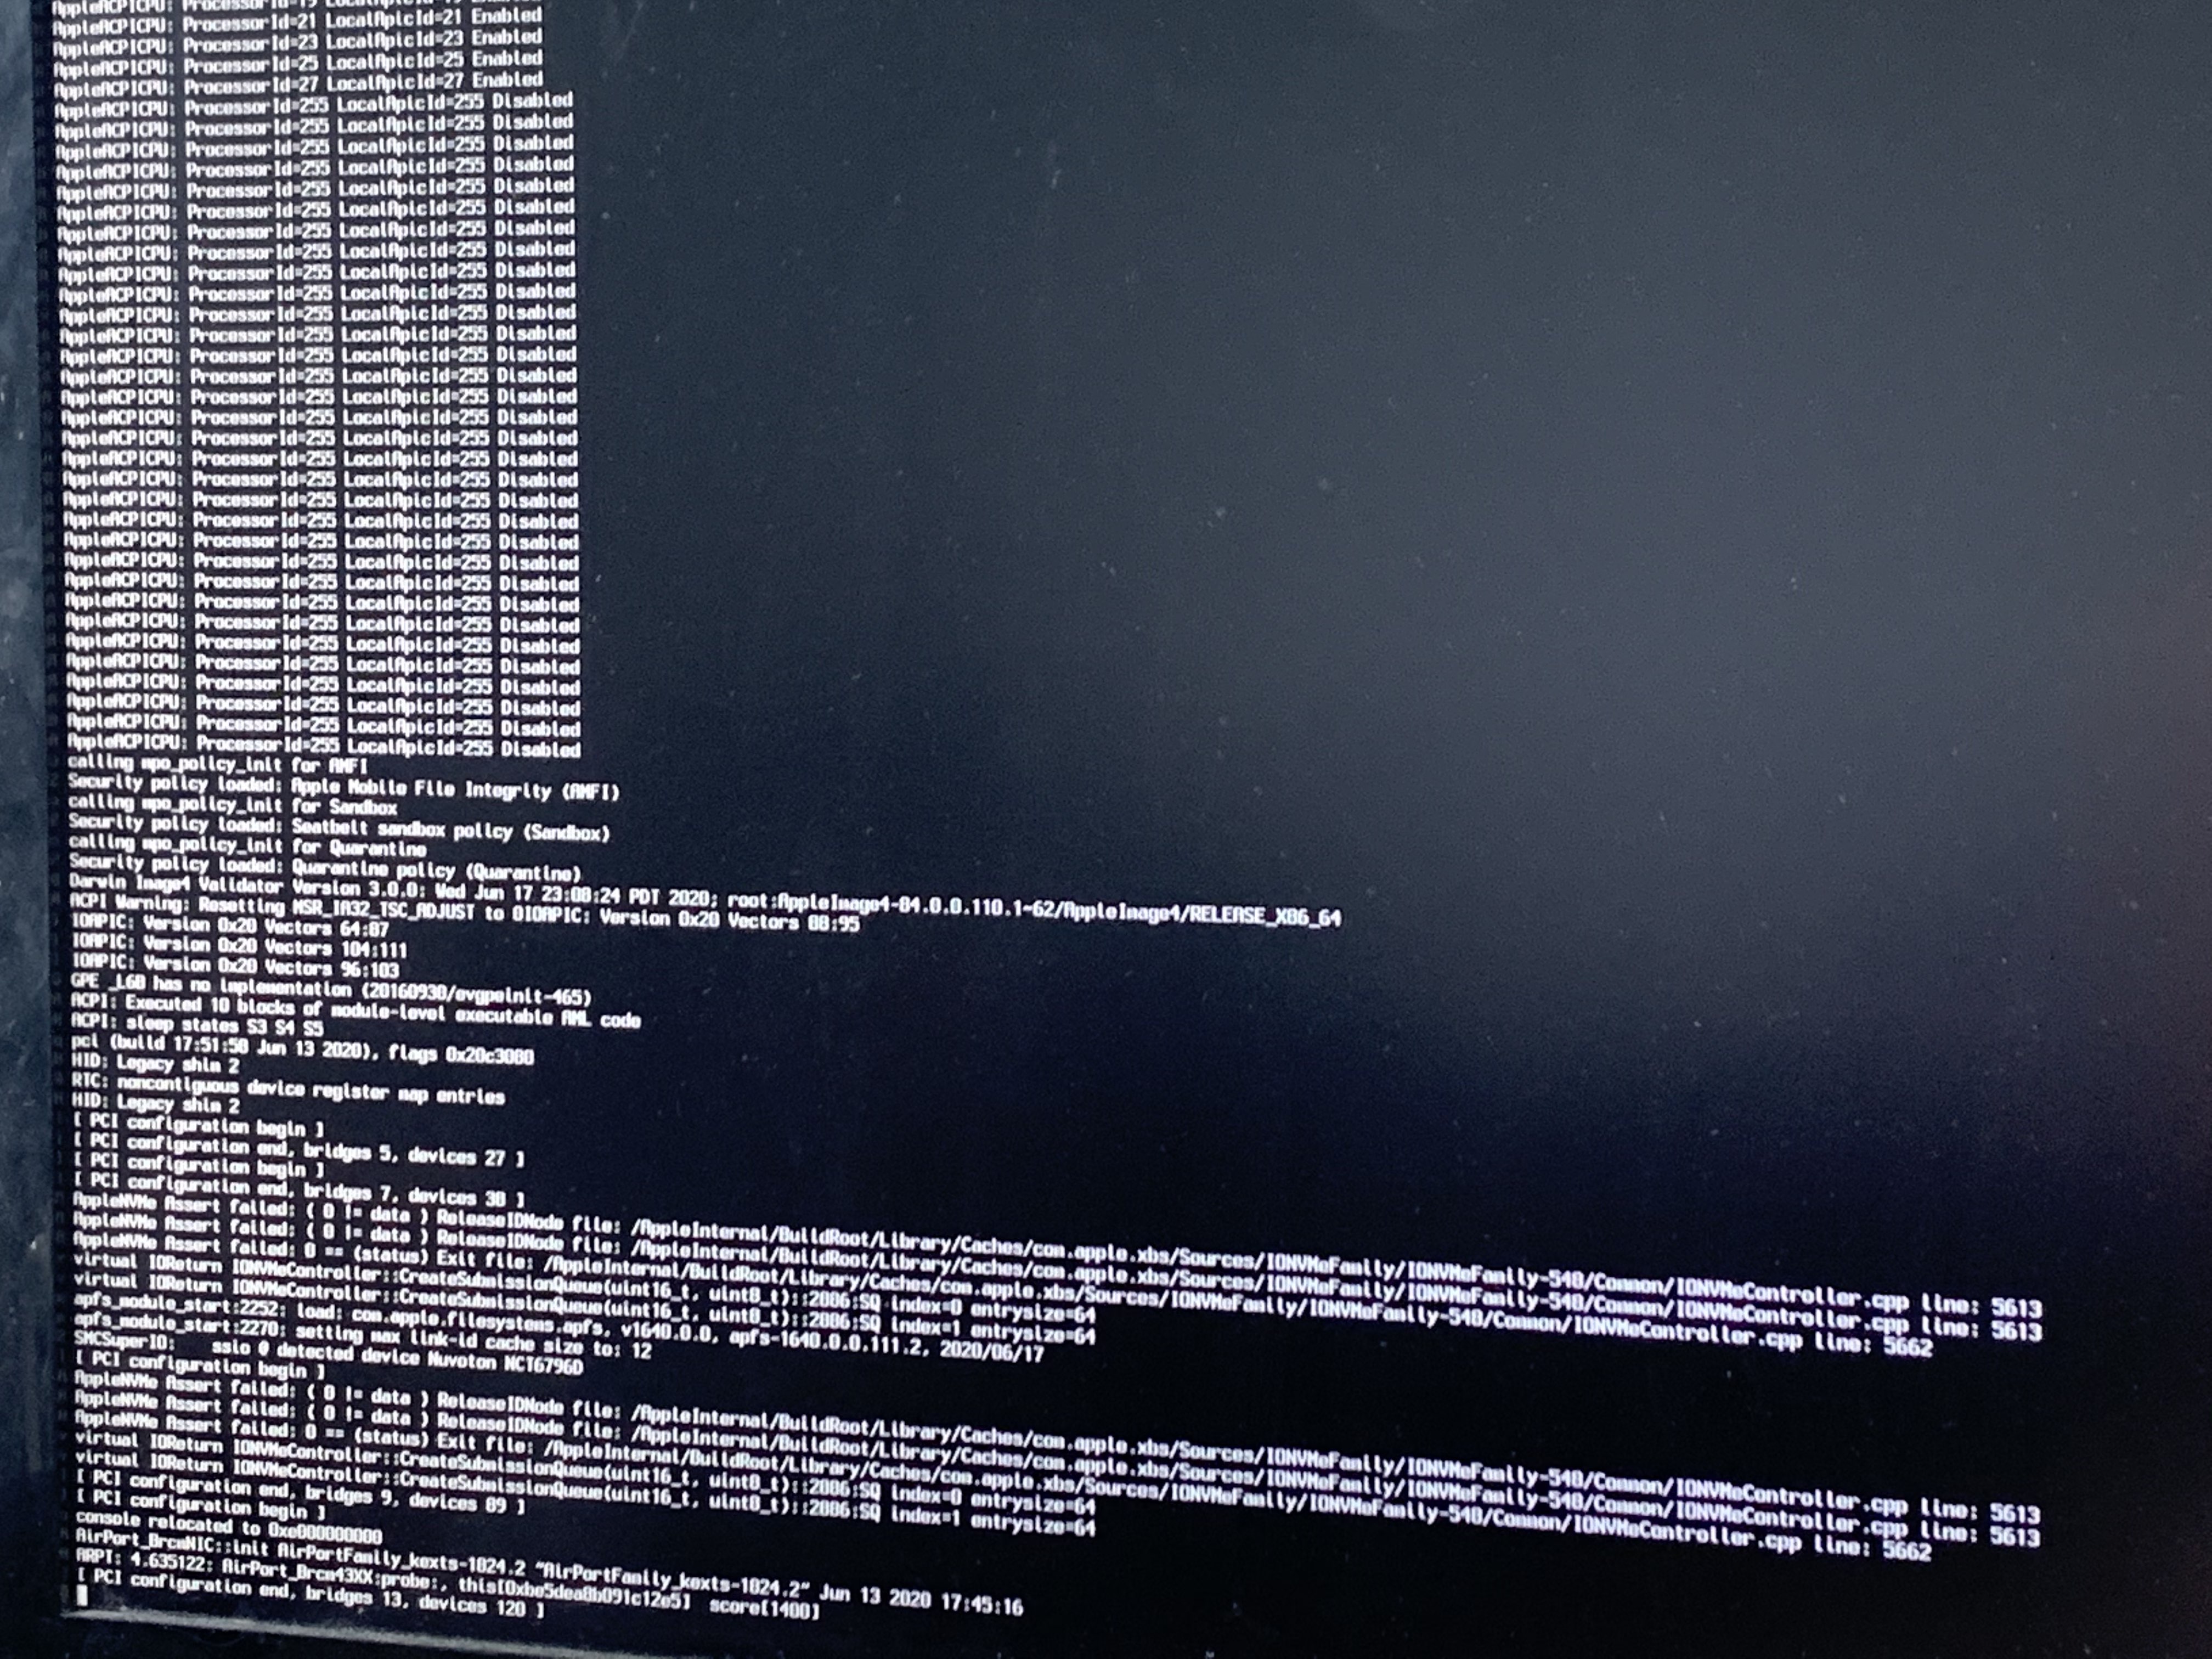
As previously mentioned, Intel HEDT motherboards may have some issues revolving around their RTC device in ACPI. To resolve, you'll need to look at your RTC device and see which regions are missing. For more information, see here: SSDT-RTC0-RANGE.dsl (opens new window)
# Stuck on ramrod(^^^^^^^^^^^^^)
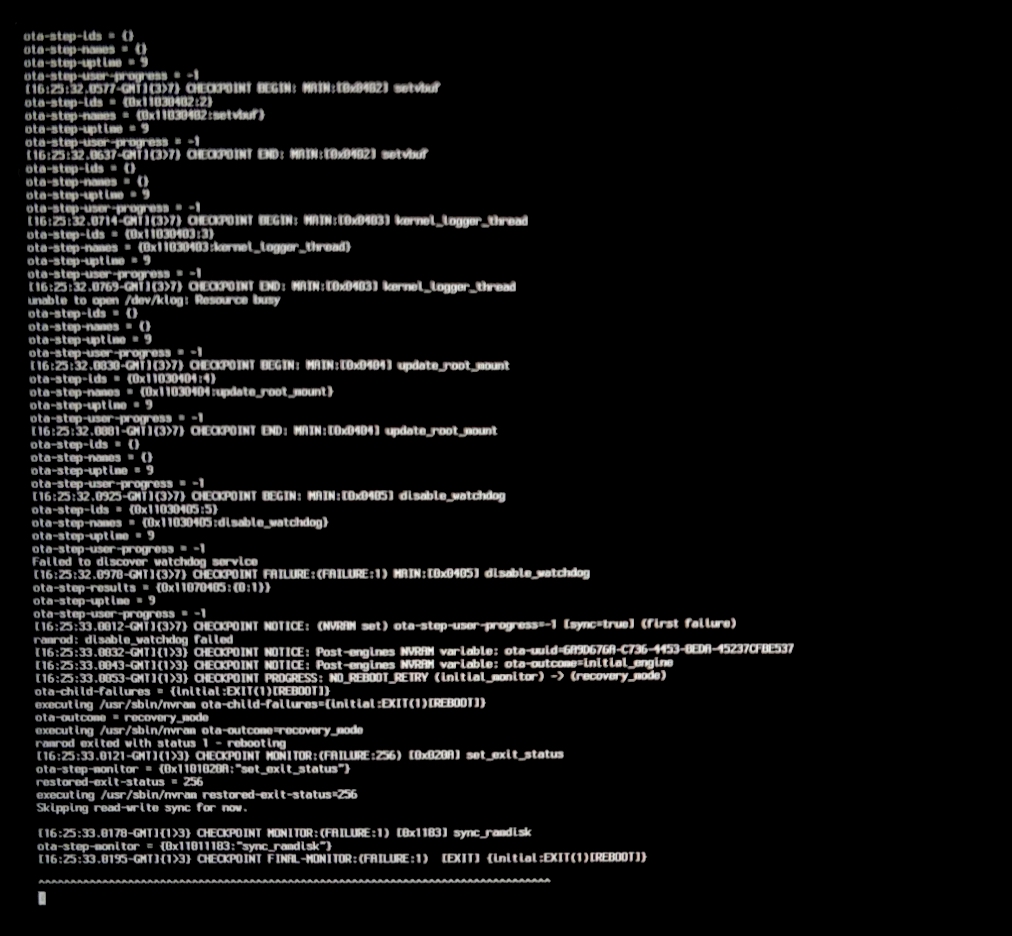
If you get stuck around the ramrod section (specifically, it boots, hits this error, and reboots again back into this, causing a loop), this hints that your SMC emulator is broken. To fix this, you have 2 options:
- Ensure you're using the latest builds of VirtualSMC and Lilu, with the
vsmcgen=1boot-arg - Switch over to Rehabman's FakeSMC (opens new window) (you can use the
MinKernel/MaxKerneltrick mentioned above to restrict FakeSMC to Big Sur and up)
And when switching kexts, ensure you don't have both FakeSMC and VirtualSMC enabled in your config.plist, as this will cause a conflict.
# X79 and X99 Kernel Panic on IOPCIFamily
This is due to an unused uncore PCI Bridges being enabled in ACPI, and so IOPCIFamily will kernel panic when probing unknown devices. To resolve, you'll need to add SSDT-UNC (opens new window) to your system
# DeviceProperties injection failing
With Big Sur, macOS has become much pickier with devices being present in ACPI. Especially if you're injecting important properties for WhateverGreen or AppleALC, you may find they're no longer applying. To verify whether your ACPI defines your hardware, check for the acpi-path property in IORegistryExplorer (opens new window):
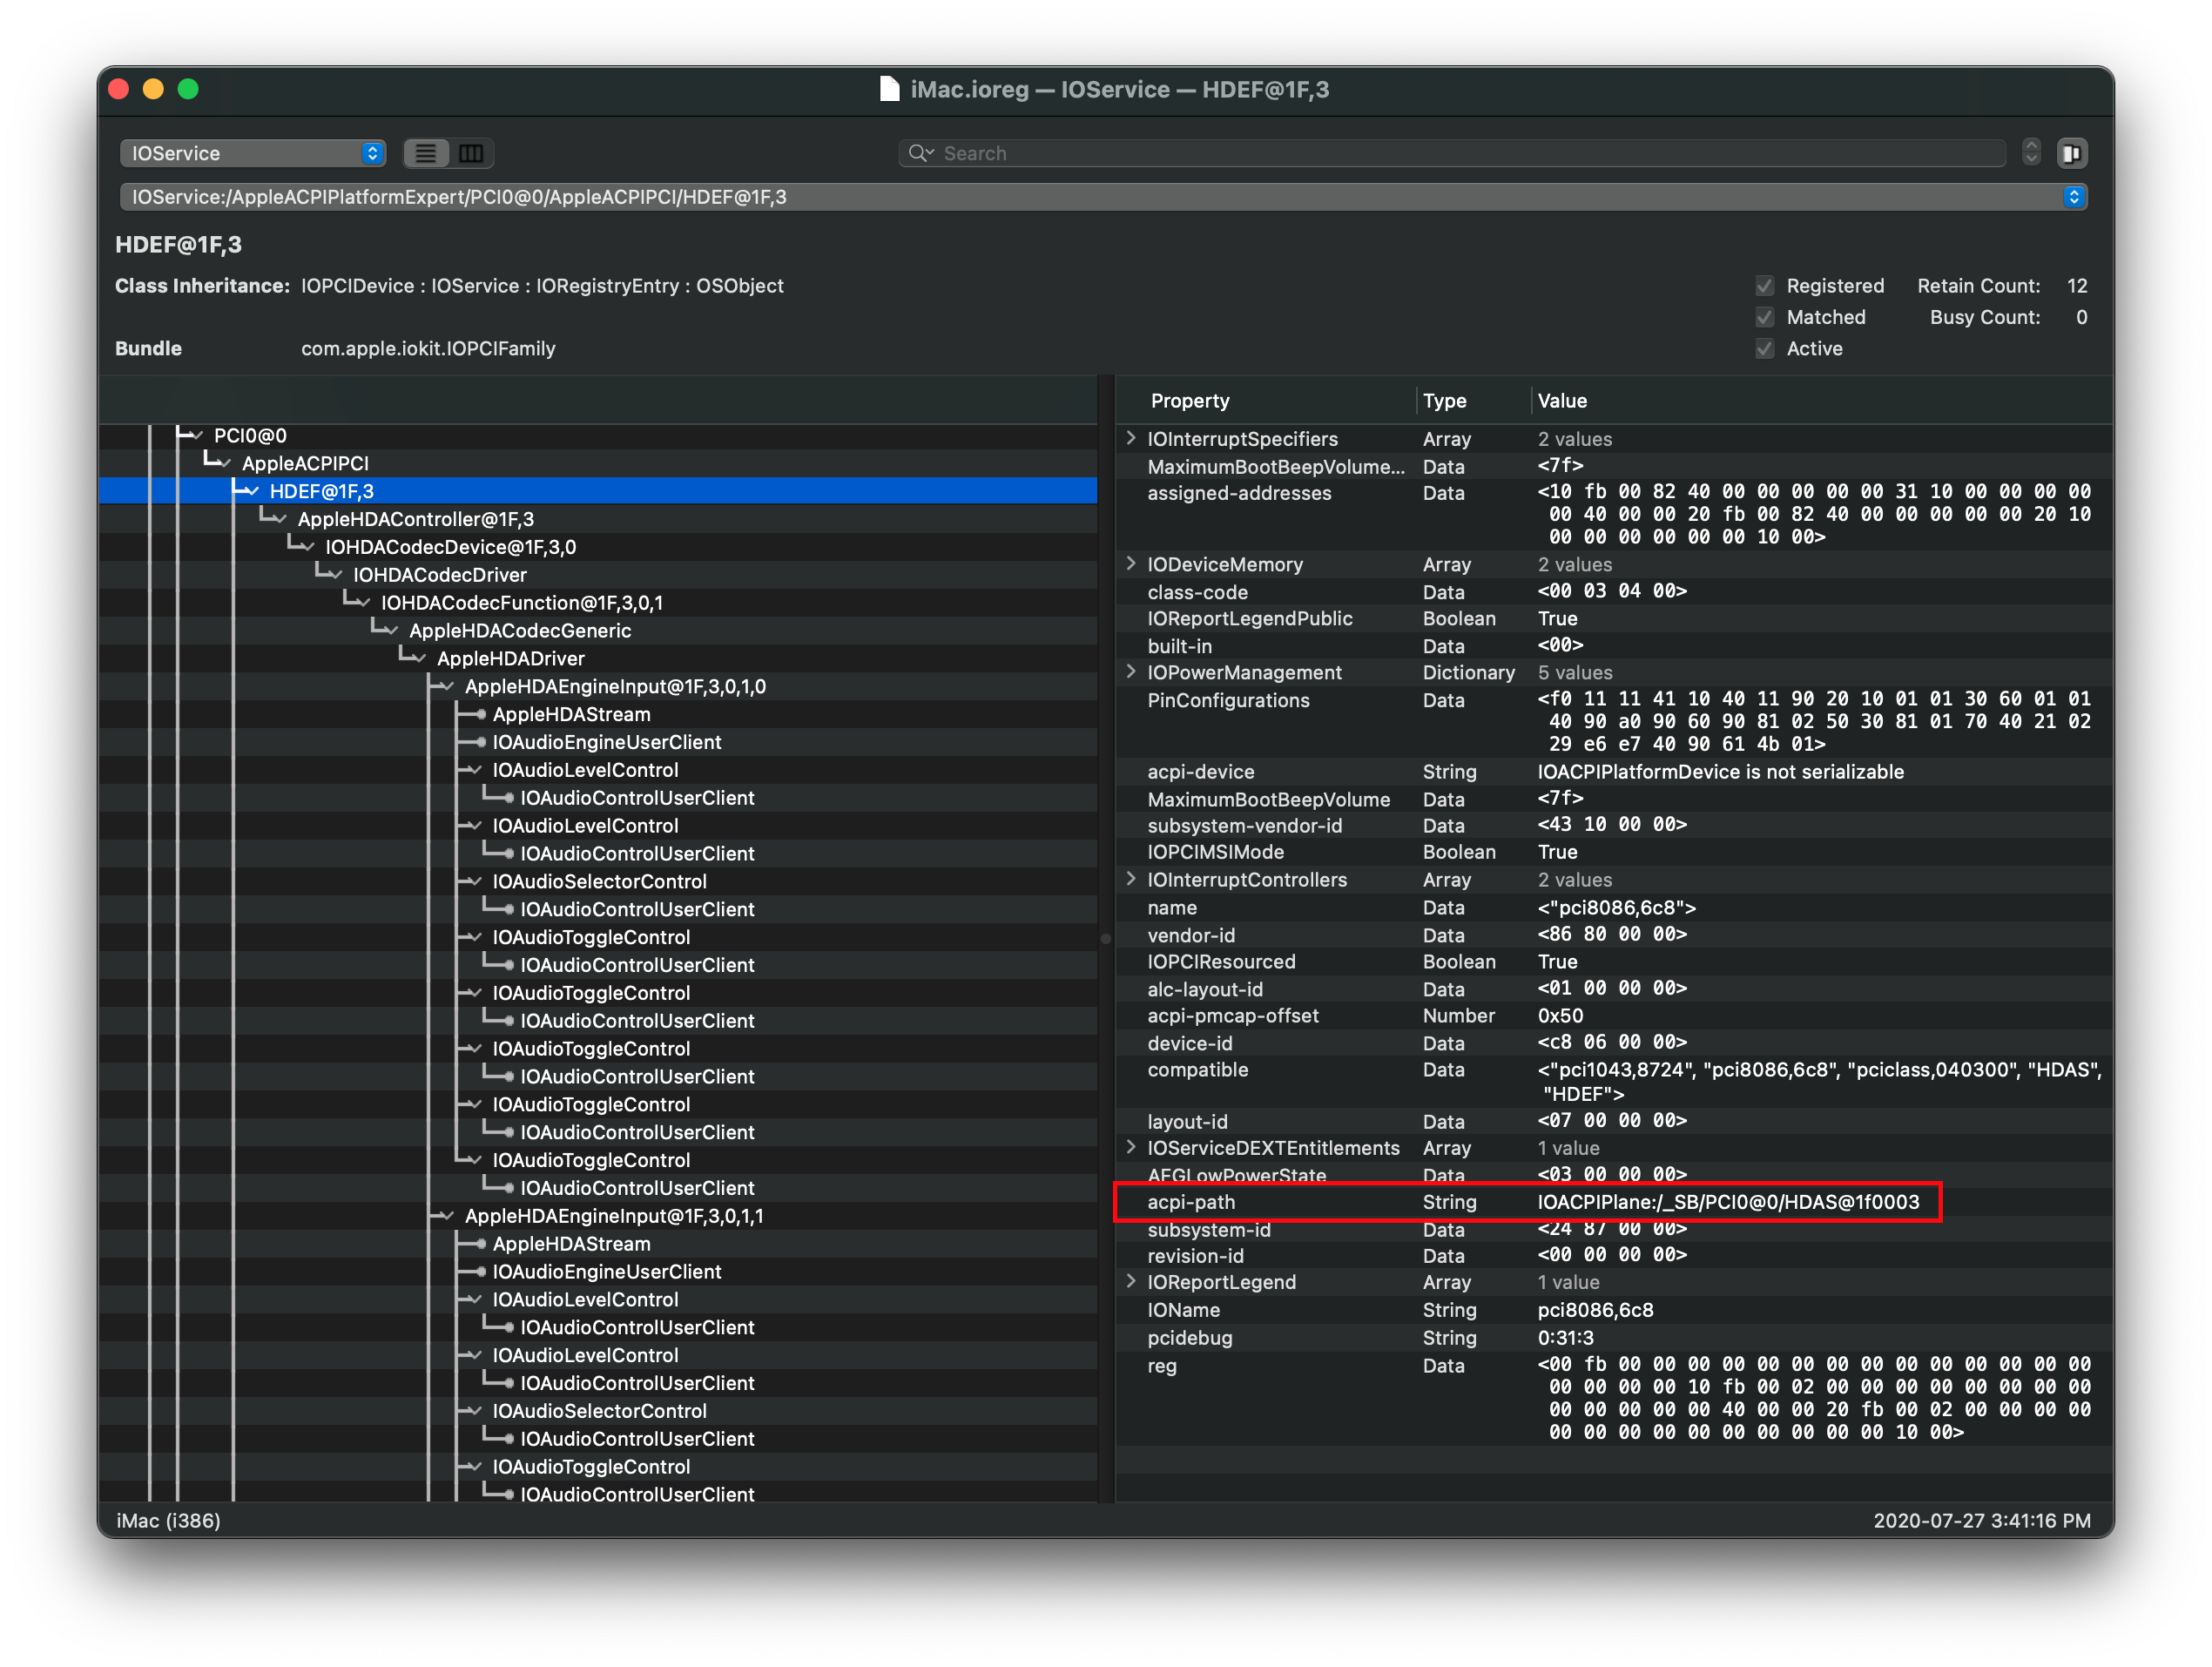
If no property is found, you'll need to create an SSDT that provides the full pathing as you likely have a PCI Bridge that is not documented in your ACPI tables. An example of this can be found here: SSDT-BRG0 (opens new window)
- Note: This issue may also pop up in older versions of macOS, however Big Sur is most likely to have issues.
# Keyboard and Mouse broken
For certain legacy systems, you may notice that while the USB ports work your HID-based devices such as the keyboard and mouse may be broken. To resolve this, add the following patch:
IOHIDFamily Patch
config.plist -> Kernel -> Patch:
| Key | Type | Value |
|---|---|---|
| Base | String | _isSingleUser |
| Count | Integer | 1 |
| Enabled | Boolean | True |
| Find | Data | |
| Identifier | String | com.apple.iokit.IOHIDFamily |
| Limit | Integer | 0 |
| Mask | Data | |
| MaxKernel | String | |
| MinKernel | String | 20.0.0 |
| Replace | Data | B801000000C3 |
| ReplaceMask | Data | |
| Skip | Integer | 0 |
# Early Kernel Panic on max_cpus_from_firmware not yet initialized
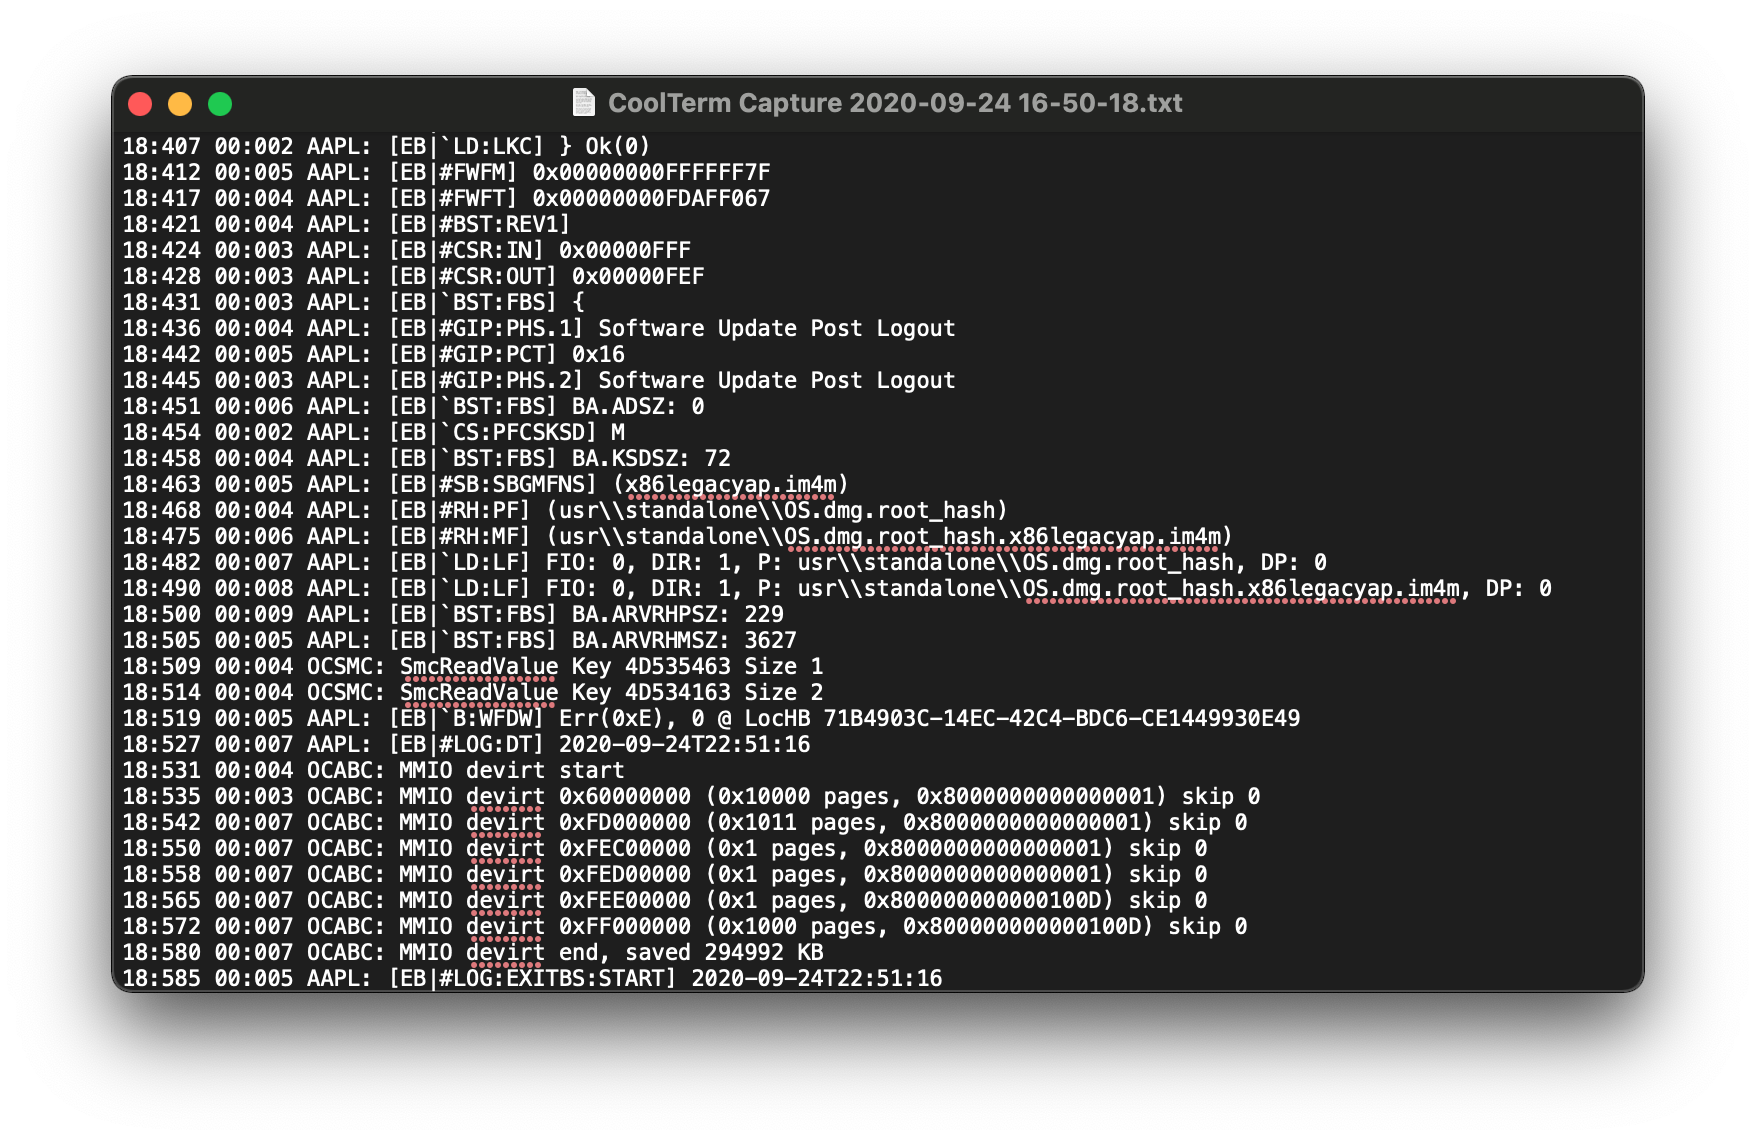
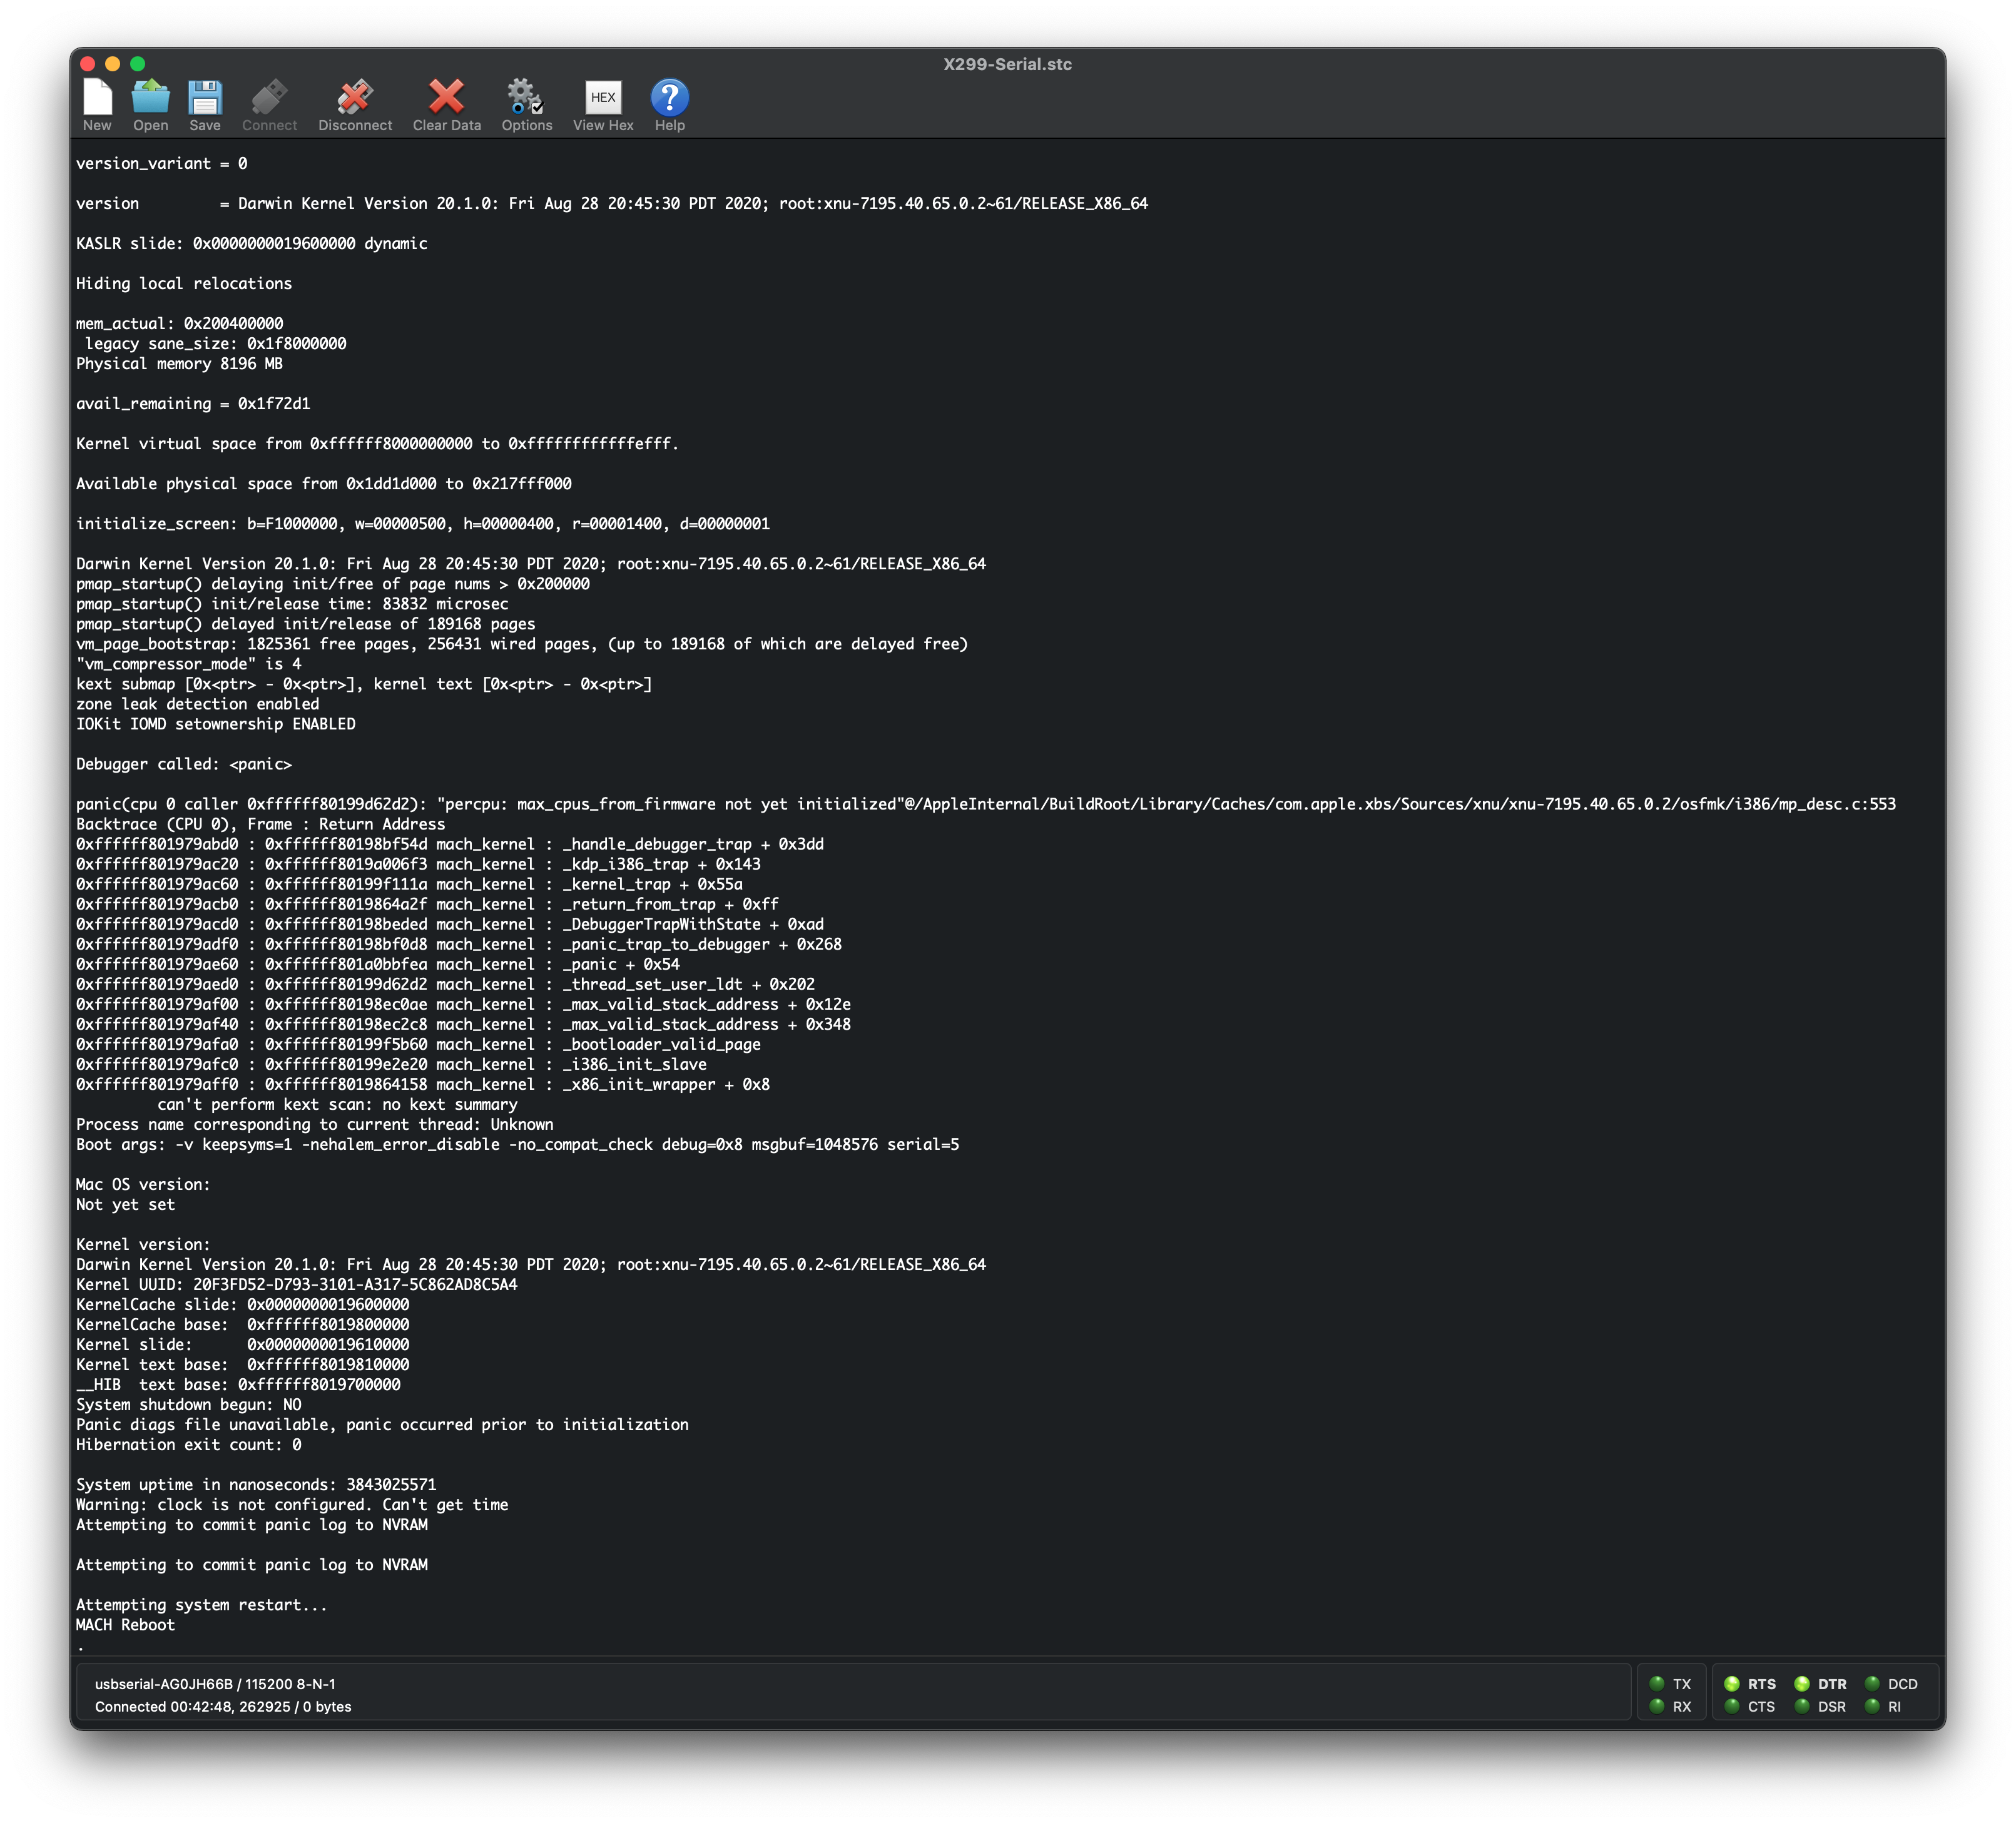
If you receive an early kernel panic on max_cpus_from_firmware not yet initialized, this is due to the new acpi_count_enabled_logical_processors method added in macOS Big Sur's kernel. To resolve, please ensure you're on OpenCore 0.6.0 or newer with the AvoidRuntimeDefrag Quirk enabled.
- Note: Due to how early this kernel panic happens, you may only be able to log it either via serial or rebooting in a known working install of macOS and checking your panic logged in NVRAM.
- Most users will see this panic simply as
[EB|#LOG:EXITBS:START]
- Most users will see this panic simply as
Example Kernel Panic
On-screen:
Via serial logging or NVRAM:
Legacy Edge Case
On certain hardware, mainly the HP DC7900, the kernel still can't determine exactly how many threads your hardware supports. This will result in the aforementioned kernel panic and so we need to hard code the CPU core's value.
To do this, Add the following patch(replacing the 04 from B8 04 00 00 00 C3 with the amount of CPU threads your hardware supports):
| Key | Type | Value |
|---|---|---|
| Base | String | _acpi_count_enabled_logical_processors |
| Count | Integer | 1 |
| Enabled | Boolean | True |
| Find | Data | |
| Identifier | String | Kernel |
| Limit | Integer | 0 |
| Mask | Data | |
| MaxKernel | String | |
| MinKernel | String | 20.0.0 |
| Replace | Data | B804000000C3 |
| ReplaceMask | Data | |
| Skip | Integer | 0 |
# Cannot update to newer versions of Big Sur
Generally there's 2 main culprits:
- Broken Update Utility
- Most common error if running a beta, try this first
- Broken Seal
# Broken Update Utility
Generally seen with every beta cycle, simply unenroll and enroll again:
# Unenroll from beta catalog
sudo /System/Library/PrivateFrameworks/Seeding.framework/Resources/seedutil unenroll
# Enroll back in
sudo /System/Library/PrivateFrameworks/Seeding.framework/Resources/seedutil enroll DeveloperSeed
Then check back with settings, and it should pop up. If not, run the following:
# List software updates via terminal
softwareupdate -l
This should help kick the update utility back into gear. If you still have issues, check the Broken Seal section.
# Broken Seal
With Apple's new snapshotting for the system drive, they now depend heavily on this for OS updates to apply correctly. So when a drove's seal is broken, macOS will refuse to update the drive.
To verify yourself, check that Snapshot Sealed returns as YES:
# List all APFS volumes
diskutil apfs list

# Look for your system volume
Volume disk1s8 A604D636-3C54-4CAA-9A31-5E1A460DC5C0
        ---------------------------------------------------
        APFS Volume Disk (Role):   disk1s8 (System)
        Name:                      Big Sur HD (Case-insensitive)
        Mount Point:               Not Mounted
        Capacity Consumed:         15113809920 B (15.1 GB)
        Sealed:                    Broken
        FileVault:                 No
        |
        Snapshot:                  4202EBE5-288B-4701-BA1E-B6EC8AD6397D
        Snapshot Disk:             disk1s8s1
        Snapshot Mount Point:      /
        Snapshot Sealed:           Yes
If it returns Snapshot Sealed: Broken, then you'll want to go through the following:
- Update to OpenCore 0.6.4 or newer
- Specifically commit
ba10b5d(opens new window) or newer is required
- Specifically commit
- Revert to older snapshots
- Mainly for those who have tampered with the system volume
- See here how to revert: Rolling back APFS Snapshots
# Kernel Panic on Rooting from the live fs
Full error:
Rooting from the live fs of a sealed volume is not allowed on a RELEASE build
This is due to issues around Secure Boot boot being enabled in Beta 10 with older versions of OpenCore. Simply update to 0.6.4 to resolve
- Specifically commit
ba10b5d(opens new window) or newer is required
# Asus Z97 and HEDT(ie. X99 and X299) failing Stage 2 Installation
With Big Sur, there's a higher reliance on native NVRAM for installation otherwise the installer will get stuck in a reboot loop. To resolve this you'll need to either:
- Install Big Sur on another machine, then transfer the drive
- Fix the motherboard's NVRAM
- mainly applicable with Asus's Z97 series
For the latter, see here: Haswell ASUS Z97 Big Sur Update Thread (opens new window)
# Laptops kernel panicking on cannot perform kext scan
This is due to multiple copies of the same kext being in your kernel cache, and to be more specific having multiple copies of VoodooInput. Look over your Kernel -> Add and verify you only have 1 copy of VoodooInput enabled.
- Note: Both VoodooI2C and VoodooPS2 have a bundled copy of VoodooInput, which you disable is up to personal preference
# Reboot on "AppleUSBHostPort::createDevice: failed to create device" on macOS 11.3+
This is due to XhciPortLimit breaking with macOS 11.3 and newer (opens new window), to resolve you must disable XhciPortLimit under Kernel -> Quirks. Please ensure you've mapped your USB ports correctly (opens new window) before doing so.
